So when my husband put in his two-week-notice the first thing one of his co-workers asked him was, "So, is your wife going to make something for your last day?"
When my husband told me this I just laughed. It would appear they'll miss my baking more than they'll miss my husband.
I told him I'd be happy to make something for his last day and to ask for requests.
The the request was, "A cake with your face on it."
I told my husband that drawing a face with frosting probably wouldn't turn out very pretty and he informed me that that was the point of the request. They were looking for a good laugh.
Where my husband works I've had the opportunity to sell cakes and have my husband advertise for me. So in order to keep and gain some clientele I wanted to go out with a bang!
I decided to make a checkerboard chocolate and vanilla cake. I wanted the inside to look pretty to compensate for whatever was going to end up on the outside.
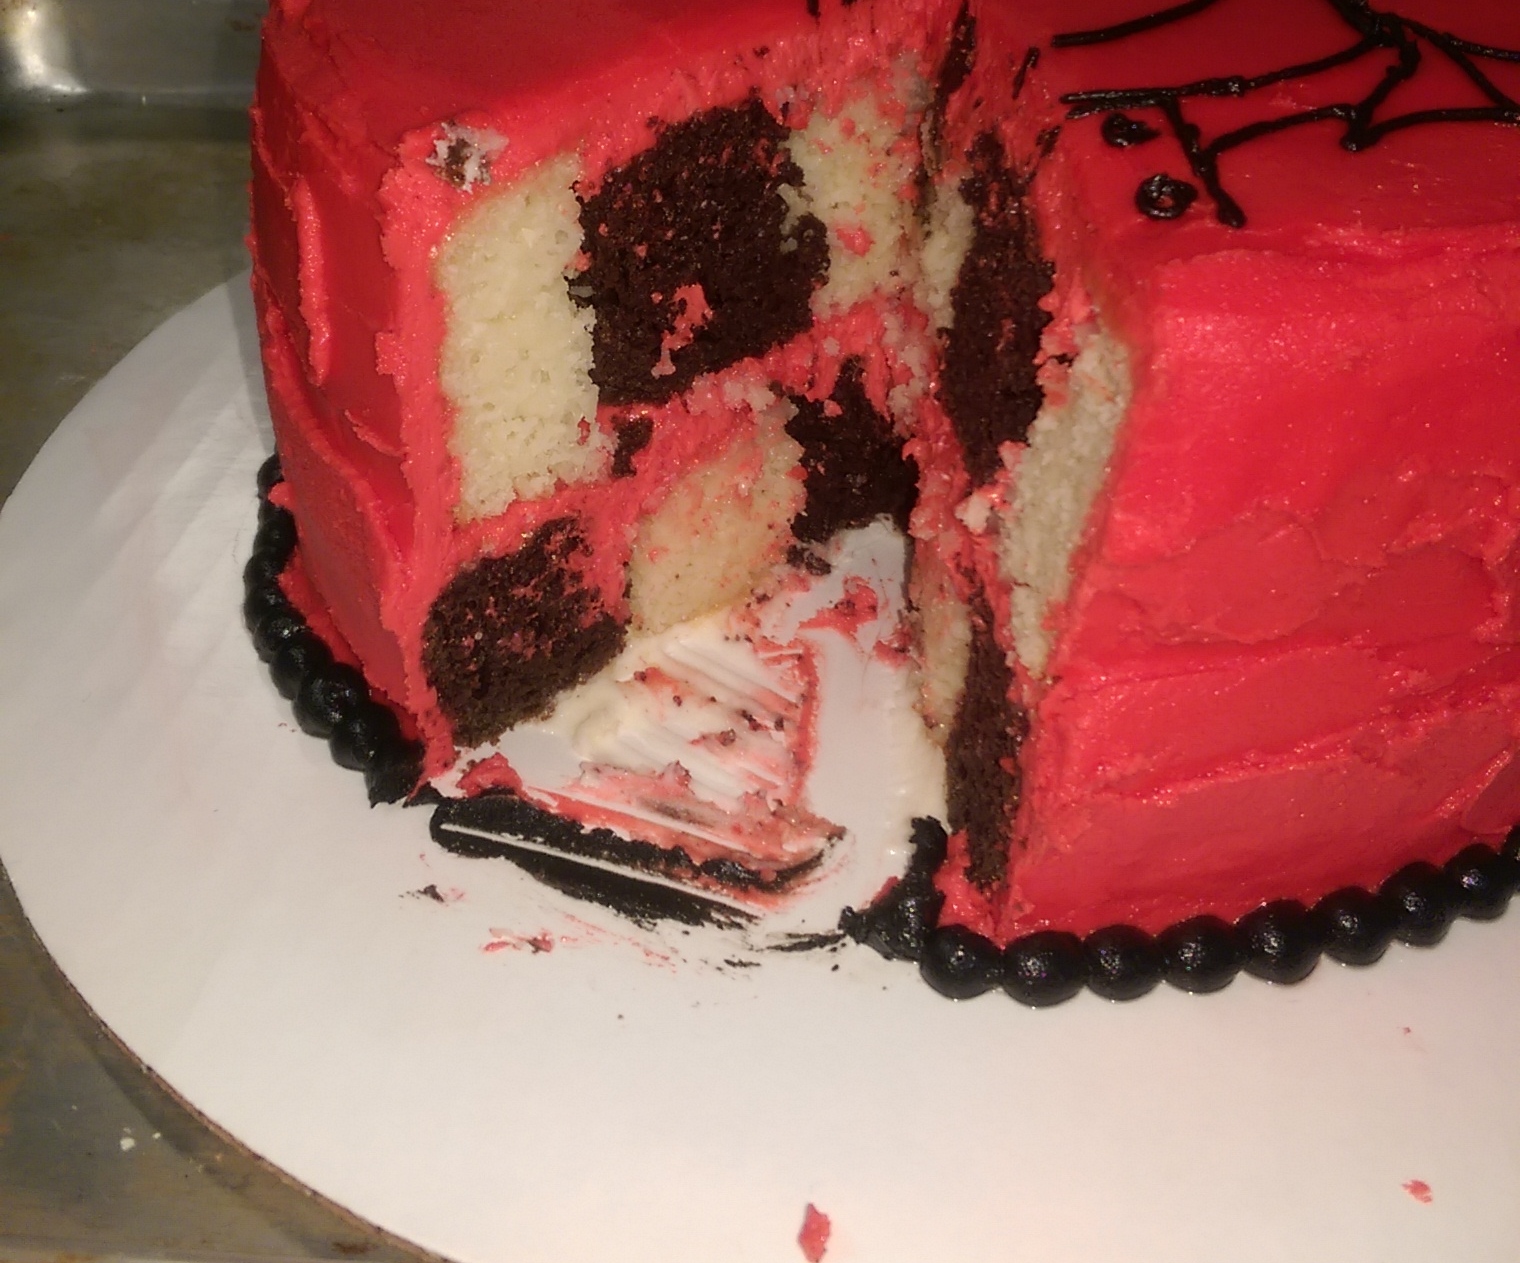
To make a checkerboard cake you need one vanilla 8 inch layer and one chocolate 8 inch layer. (You can do as many layers as you like but I only had time for two. Also be sure to level both cakes before cutting, in my rush I forgot a lot of steps so my cake doesn't look as flawless as I'd like)
After the layers are baked and entirely cooled cut out two circles in each layer like you're making a target. Before cutting it's a good idea to place the cake in the freezer to stiffen it.
I also placed it in the freezer after cutting but NOT before removing the cut out circles to stiffen again.
It is also important to measure each circle to end up the same size so corners line up inside the cake. (I wasn't very careful and didn't take the time to measure because I only had one day in which to make the cake and I wasn't about to stay up till one in the morning.)
After each layer is cut to look like a target remove the inside rings and alternate, vanilla, chocolate; chocolate vanilla as shown:

After you have your black and white targets just stack the cake as you normally would with frosting between each layer. Then you can dirty ice it. Let it harden in the freezer for 10-20 min and then put your final top coat of frosting on.
Then came the decorating part. I first took a picture of my husband in the pose I imaged.

I then tried to edit the photo on my phone to make it look like a pencil sketch.
(I decided that just doing an outline of his facial features would be easiest.)

After doing a very rough sketch with a toothpick on top of the cake I grabbed my piping bag and began my endeavor. I personally think I couldn't have drawn something better with a pencil. Frosting is my choice of medium in the artistic world and I think it suits me.

What do you think?!
I decided to pipe a beaded border around the bottom and leave it simple. The cake is red and black because I recently did a Mickey Mouse cake for a client and I had a lot of frosting left over. One of Brian's coworkers thought it looked like a Lenin cake with the red and black. HAHAHA!

Anyway I think it turned out great and his coworkers had a blast looking at it and eating it. My husband put it on his bosses desk before she got to work and when she walked into her office she busted out laughing. I'm glad my cakes can entertain people as well as be satisfying to eat.


